Cinema
A high-impact, full width format that looks fantastic on any screen.
Resources:
Explore our Ad Gallery for examples of this format.
In this article, you will learn:
How to Configure the Cinema Unit Properties
How to Build a Cinema Unit
Below you will find a step-by-step process to build a Cinema unit.
- Provide a unique Name for the unit, and select Cinema from the Format dropdown.
- Define your ad dimensions. This will determine the center area canvas size.
- Backup Image (Optional) and Click URL (Optional) may be left blank at this time, click Submit.

Configuring the canvas
The builder will now load the main Cinema canvas based on the dimensions inputted in step #2. You may now place your ad content and creatives.

Configuring the General Ad Properties
Modifications can easily be made to the general ad configuration using the General Ad Properties panel on the right-hand side of the builder window. See this article for instructions on configuring the General Ad Properties.
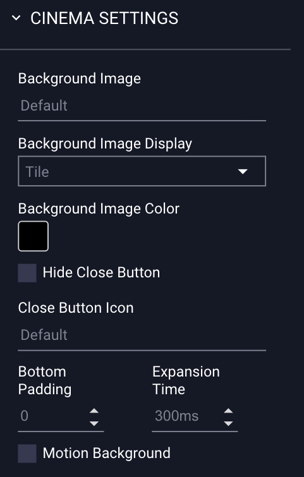
How to Configure the Cinema Unit Properties

The Cinema properties configuration options are explained below:
| Background Image | The image that will be displayed as the background, behind the center canvas area. |
| Background Image Display |
Tile - Automatically repeat the image in blocks across the background. Fill - Autosize the background image asset to fill the entire background area. Contain - Autosize the background image asset to be contained within the site content area. Stretch - Autosize the background image to stretch across the entire background. |
| Background Image Color | The color of the background. |
| Hide Close Button | If selected, the default "X" close button will not appear. |
| Close Button Icon | Upload a custom close button icon here. |
| Bottom Padding | Padding on the bottom of the ad unit. By default padding is 0px. |
| Expansion Time | The amount of time to expand the ad. By default, this is set to 300ms. |
| Motion Background | If selected, your background image will be animated to slowly zoom in and pan horizontally. |