Resources:
Explore our Ad Gallery for examples of this tool
In this article, you will learn:
How to Add the Animations Tool
How to Add a Sliding Animation to an Object
How to Add a Fading Animation to an Object (Fade In or Out)
How to Add a Rotating Animation to an Object
How to Add a Scaling Animation to an Object (Increase/Decrease the Size)
How to Add a Parallax Scroll Animation to an Object
How to Preview and Edit your Animations
How to Add the Animations Tool
- Choose the ad format and dimensions of the ad unit you wish to add animations to.
- From inside the Ad Builder, click on any element you want to animate.
- With your asset selected, go to the Tools Panel and click on the Animations icon
 to open the Animations editor screen within the builder.
- Select the type an Animation from the dropdown menu: Slide, Fade, Rotate, Scale or Parallax Scroll.
-
Set Easing effects (optional).
* Note - Easing functions specify the speed at which an animation progresses at different points within the animation, making animations appear more natural.
NOTE: You can have multiple animations on a single object/layer. See video below:
How to Add a Sliding Animation to an Object (Slide an Object from Point A to Point B)
- Ensure that your object is selected on canvas, and click the "Animation" icon in the tools panel (outlined in section 1).
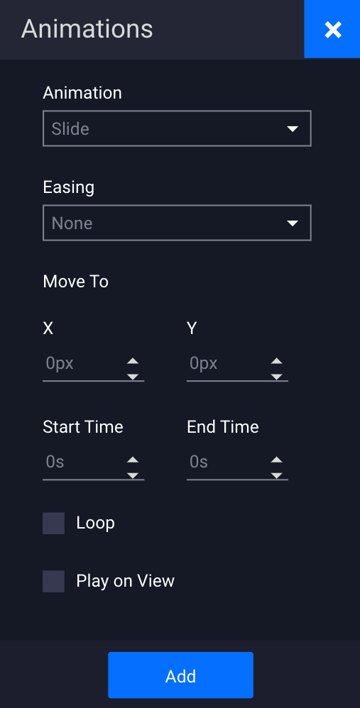
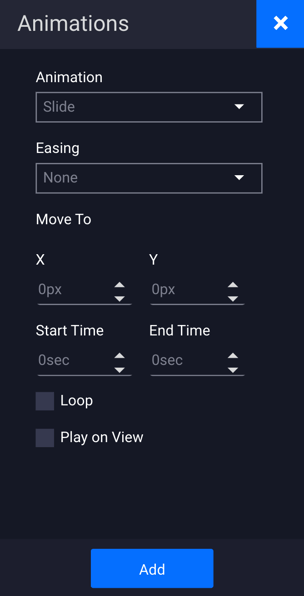
- Select "Slide" from the Animation dropdown menu:
-
Set Easing effects (optional).
* Note - Easing functions specify the speed at which an animation progresses at different points within the animation, making animations appear more natural.
- Move To: Enter the X and Y coordinates of where you'd like the object to move to.
* Note:
X: 0 and Y: 0 would be the upper left-hand corner of your ad canvas. You can also move objects in from off screen by using a negative value. - Start Time: Time (in seconds) when the animation will be initiated.
- End Time: Time (in seconds) when the animation will be completed.
- Loop: Select this option to loop the animation infinitely.
- Play on View: Selecting this option will trigger the animation to start when the ad becomes visible/enters the viewable area (vs. on page load).
* Note - If this is selected and the ad is only 50% or less visible, the animation will not show. - Click Apply to save your animation.
How to Add a Fading Animation to an Object (Fade In or Out)
- Ensure that your object is selected on canvas, and click the "Animation" icon in the tools panel (outlined in section 1).
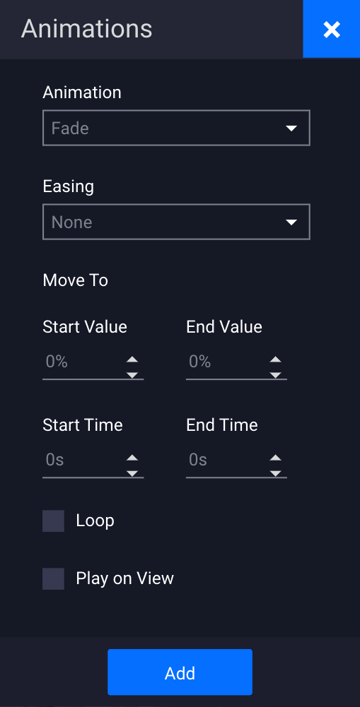
- Select "Fade" from the Animation dropdown menu:
-
Set Easing effects (optional).
* Note - Easing functions specify the speed at which an animation progresses at different points within the animation, making animations appear more natural.
- Start Value: Set the opacity of the object at the start of the animation.
- End Value: Set the opacity of the object at the end of the animation.
* Note:
100% = fully visible
0% = transparent - Start Time: Time (in seconds) when the animation will be initiated.
- End Time: Time (in seconds) when the animation will be completed.
- Loop: Select this option to loop the animation infinitely.
- Play on View: Selecting this option will trigger the animation to start when the ad becomes visible/enters the viewable area (vs. on page load).
* Note - If this is selected and the ad is only 50% or less visible, the animation will not show. - Click Apply to save your animation.
How to Add a Rotating Animation to an Object
- Ensure that your object is selected on canvas, and click the "Animation" icon in the tools panel (outlined in section 1).
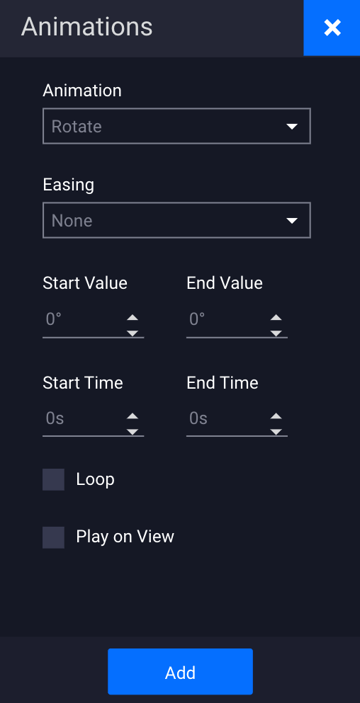
- Select "Rotate" from the Animation dropdown menu:
-
Set Easing effects (optional).
* Note - Easing functions specify the speed at which an animation progresses at different points within the animation, making animations appear more natural.
- Start Value: Set the rotation degree (0-360˚) of the object at the start of the animation.
- End Value: Set the rotation degree (0-360˚) of the object at the end of the animation.
- Start Time: Time (in seconds) when the animation will be initiated.
- End Time: Time (in seconds) when the animation will be completed.
- Loop: Select this option to loop the animation infinitely.
- Play on View: Selecting this option will trigger the animation to start when the ad becomes visible/enters the viewable area (vs. on page load).
* Note - If this is selected and the ad is only 50% or less visible, the animation will not show. - Click Apply to save your animation.
How to Add a Scaling Animation to an Object (Increase/Decrease the Size)
- Ensure that your object is selected on canvas, and click the "Animation" icon in the tools panel (outlined in section 1).
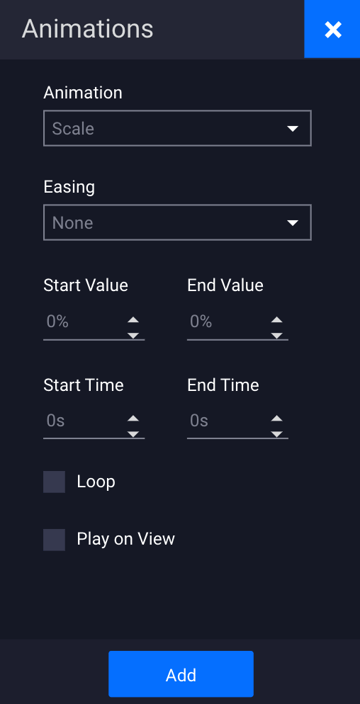
- Select "Scale" from the Animation dropdown menu:
-
Set Easing effects (optional).
* Note - Easing functions specify the speed at which an animation progresses at different points within the animation, making animations appear more natural.
- Start Value: Set size of object at the start of the animation. 0-1000%
- End Value: Set size of the object at the end of the animation. 0-1000%
- Start Time: Time (in seconds) when the animation will be initiated.
- End Time: Time (in seconds) when the animation will be completed.
- Loop: Select this option to loop the animation infinitely.
- Play on View: Selecting this option will trigger the animation to start when the ad becomes visible/enters the viewable area (vs. on page load).
* Note - If this is selected and the ad is only 50% or less visible, the animation will not show. - Click Apply to save your animation.
How to Add a Parallax Scroll Animation to an Object
Notes:
- Parallax units vary greatly depending on the site, and where they are to be placed on the site (where the container is set up), so be sure to contact support@adventive.com to test prior to your first campaign. Also applies to site re-design or if different sections of your site are set up differently - please contact us to test before going live with a campaign.
- Check out our article Parallax Scroll for more information.
Examples:
Desktop Example 3 (Background Parallaxing w Video)
Desktop Example 4 (Cappadocia) Separate Article here
Below you will find a step-by-step process for configuring a Parallax Scroll animation:
- Prepare your assets. Each image you want to animate/scroll should be its own .png or .jpg file, etc. You will be putting an animation on each one to scroll, so you should separate each from the background image.
- Open the builder and create a New File – choose “Banner” as the Format and put in the canvas dimensions and a backup image/click url:

- Upload your assets to the canvas via the landscape icon
 . In this example, we uploaded 3 assets which you can see at the bottom left of the screen in the builder:
-
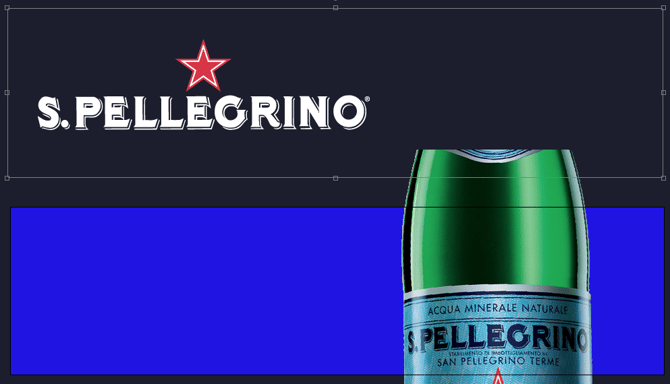
Set the first asset you would like to animate OFF the canvas (you may want to zoom out using the zoom bar in the bottom right of the screen). Either set it above the canvas if you plan for it to scroll down, or set it below the canvas if you plan for it to scroll up (left and right is also available):
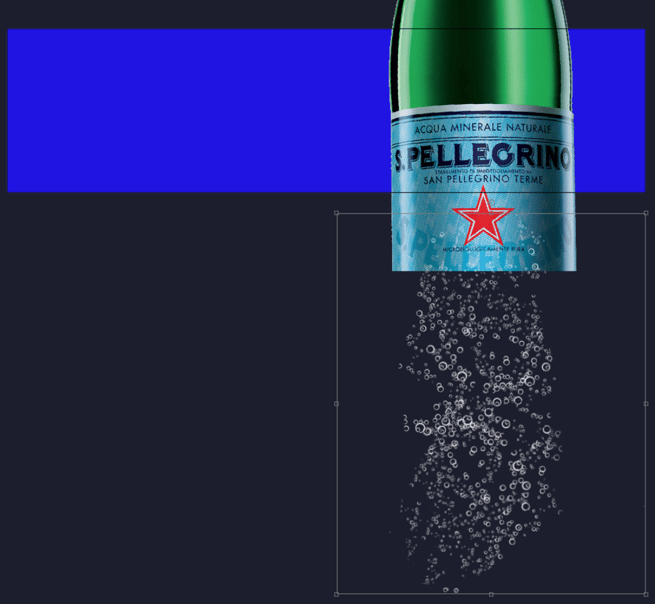
- In the above example, our canvas is sized to 970px x 250px, and we've set the background Fill Color to blue. We selected the “bubbles.png” asset, and placed it below the canvas for now, as we plan to have it parallax scroll Up and over the bottle.
- Click on the name of asset layer at the bottom of the screen that you would like to animate (in this example, we chose the “bubbles.png”):

- Click on the Animations icon
 to the left of the builder, and the Animations screen will appear:
- Select Parallax Scroll from the "Animation" dropdown menu:
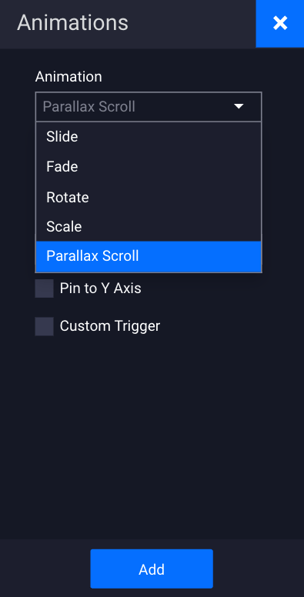
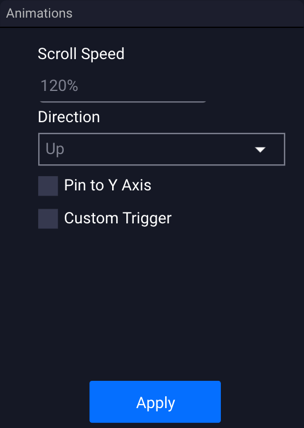
- Once selected, you can change the Scroll Speed, Direction, Pin to Y Axis, and Custom Trigger point.

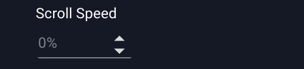
- Scroll Speed – Choose how fast your image will move.
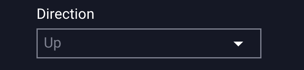
- Direction – Choose which direction the image will move: Up, down, left or right.
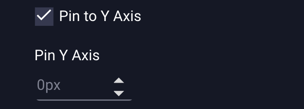
- Pin to Y Axis – Select this to pin the selected image to a Y Axis point on the canvas. This is where your image will stop scrolling. Or you can choose to not select this.
- Custom Trigger – If left unchecked, the default will set the trigger point (start of animation) at 90% from the top of the page OR the top of the ad container (whichever is higher). The trigger point will display on the preview page for you to check however, it is recommended to test on live page. For help identifying or troubleshooting site/trigger point settings, please contact support@adventive.com
* Note - Trigger points will depend on where the placement will run on the site (discussed below in article) - you should have a container placed where you want the parallax to display prior to testing (i.e. mid-article, etc.). You should also have a test page (with the container set up) to traffic to so you can go back into the build and adjust the scroll speed or parallax trigger point as needed. - If you select the Custom Trigger, you can set the page position in percentage or pixels. i.e. if you plan to run this ad 30% from the top of your site, you can set this as the custom trigger point and it will show the start and end points where the animations happen in preview according to your settings.
NOTE: If you select the Custom Trigger point for just one animation, it will set the same trigger point for the rest of your animations (unless you define each one).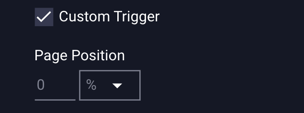
- In this example, we chose the “bubbles.png”, selected Parallax Scroll, and set the Scroll Speed to 120% (this is just an estimate – you will need to preview the ad to see how fast the image moves, and to make adjustments according to your customer’s feedback). We also set the direction to “Up”, as we want the "bubbles.png" image to scroll up. We didn’t set a “Pin to Y Axis”, as we don’t want the bubbles to stop scrolling/animating. Once your settings are selected, hit "Add".

- Be sure to save your ad along the way - you can Preview
 the ad to test at any point. If you want to edit the Parallax Scroll animation, go to the bottom of the builder, select the asset, and right click on the red bar showing the animation:
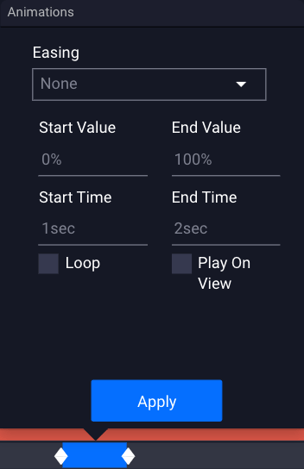
- When you click on “Edit”, the following screen will appear:
- Make any necessary changes and click “Apply”.
- Go to the next image you would like to animate and follow the same steps as above. For this example, we will apply the Parallax Scroll animation to the “logo-970x90.png” asset.
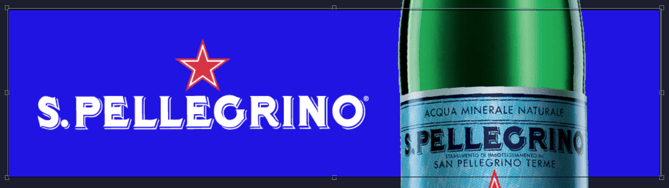
- Select the “logo-970x90.png” asset and position it Above the blue canvas for now, as we plan to have it parallax scroll down. We also want it to stop on the canvas (to not keep scrolling down and off the canvas), so we will select "Pin to Y Axis" for this asset.
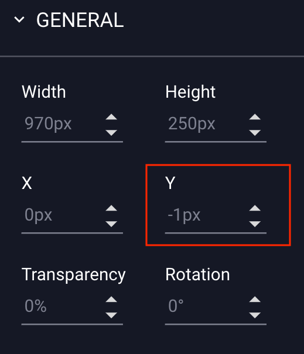
- To figure out the “Pin to Y Axis”, place the asset on the canvas where you want it to end up and look at the Y axis it is placed at within your General Properties Panel (it is at -1 Y axis, and this is what we will enter in the Parallax Scroll Animations screen):
- Now place the logo back to where you want it to start, above the canvas. Then, with the “logo-970x90.png” layer selected, click on the icon
 to the left of the builder and the “Animations” screen will appear. Choose Parallax Scroll from the dropdown, and set all the parameters as listed above.
 - For this animation we selected a Scroll Speed of 130% (this is just an estimate – you need to preview the ad to see how fast the image moves, and to make adjustments according to your customer’s feedback). We will also set the direction to “Down” as we want the logo to scroll down.
We also selected "Pin to Y Axis" for this animation, as we want the logo to stop on the canvas. We have set this asset to pin to -1 Y Axis, as this is where we had determined previously that we want the image to stop on the canvas. Click "Add":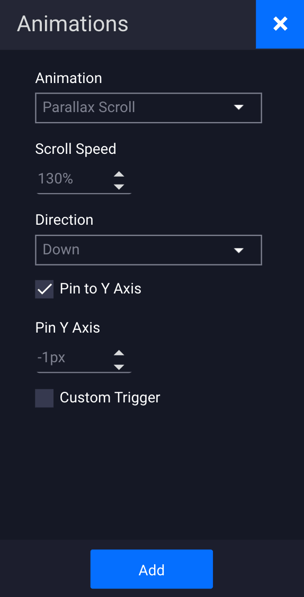
- Be sure to save your ad along the way - you can Preview the ad to test at any point. If you want to edit the Parallax Scroll animation, go to the bottom of the builder, select the asset, and right click on the red bar showing the animation:

- When you click on “Edit”, the following screen will appear:
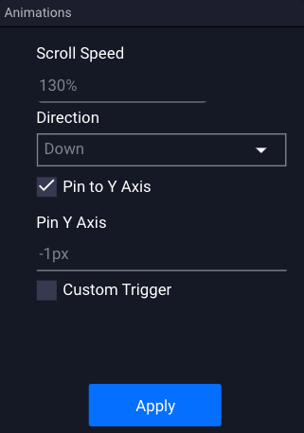
- Make any necessary changes and click “Apply”.
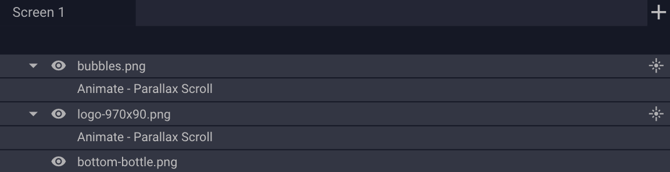
- To see everything applied to all assets – click on the bar icon
 at the bottom of the builder and drag it up. In this example, you should now see all the assets and their animations listed next to them:
- Objects/layers that have animations applied are indicated with a star icon in the screens and layers panel at the bottom of the Builder.
* Once saved (and republished within the campaign), you should refresh your test site to see the changes applied.
If more edits are necessary, go back into the ad, right click on the parallax animation, make the updates, click "Apply", and save and republish. Repeat as necessary.
To learn more about republishing updated ad units within a campaign, see our article Updating Inflight Campaigns.
NOTE: You can also have multiple animations on an object. For example, you can have an image scale in on ad load, and then fade out after two seconds. (Set an animation on the layer/asset. When finished, repeat - select the layer/asset again and then the animation button and make your selection. Repeat to add multiple animations on one layer/asset). See video below:
Previewing + Editing Animations
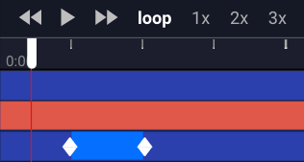
You are also able to loop or replay an entire animation sequence, including all animations applied to layers, on your ad screen. Looping and replay options are located just above the animations timeline. Select Loop to set your animation sequence to play infinitely or 1x, 2x, or 3x times.
In the below example, we've added a Fade animation to the "logo-970x90.png" layer, along with the previously added Parallax Scroll.
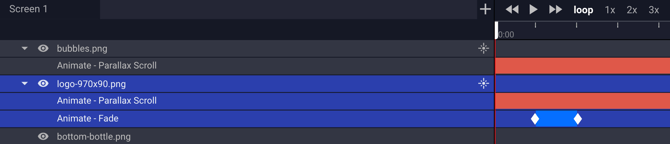
To preview your animation you can click the play button ![]() at the top of the timeline, or drag the red scrubber to manually view your animation. You can also view the animation in the ad preview.
at the top of the timeline, or drag the red scrubber to manually view your animation. You can also view the animation in the ad preview. ![]() You can also easily adjust the length of your animation by clicking and dragging the white markers in your animations timeline:
You can also easily adjust the length of your animation by clicking and dragging the white markers in your animations timeline:
To edit or delete an animation, right click on the animation bar in the timeline.
Note: This does not delete the layer, only the animation effect applied to it.
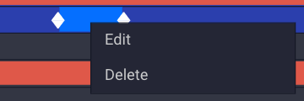
Selecting "Edit" will open the popup window where you can edit the animation. Make necessary changes and hit "Apply". Changes are also automatically saved when you click outside the popup window.