In this article, you will learn:
How to Insert a Twitch Video Within Adventive
How to Insert a Twitch Collection Within Adventive
How to Insert a Twitch Channel Within Adventive
Limiting Autoplay for "Heavy Ads"
How to Insert a Twitch Video Within Adventive
You can embed an individual video, a collection of videos, or a Twitch channel into an Adventive ad. Each code will differ slightly, depending on what you would like to insert.
- To insert an individual video, navigate to the video on Twitch that you'd like to use in your Adventive ad.
- Copy the Video ID from Twitch.
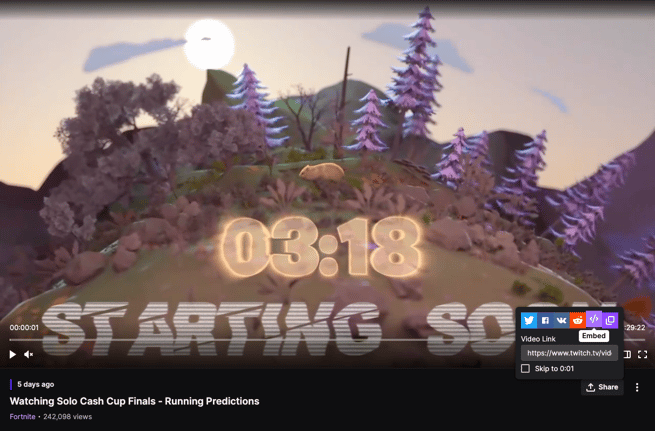
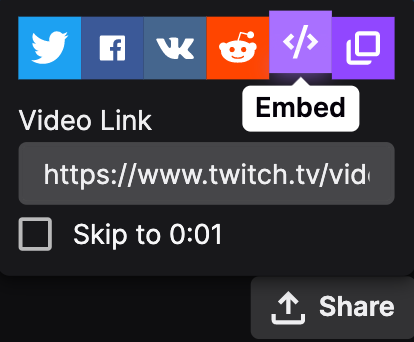
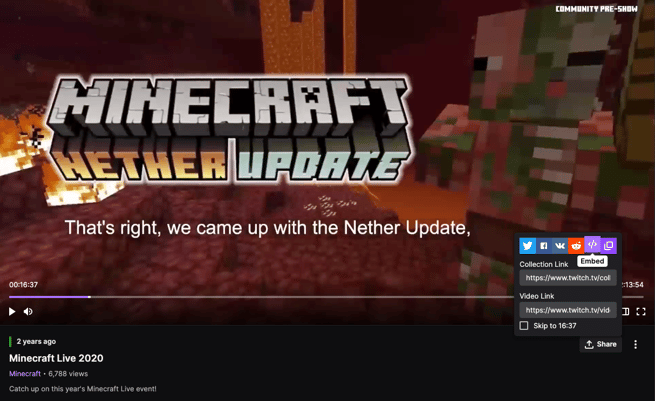
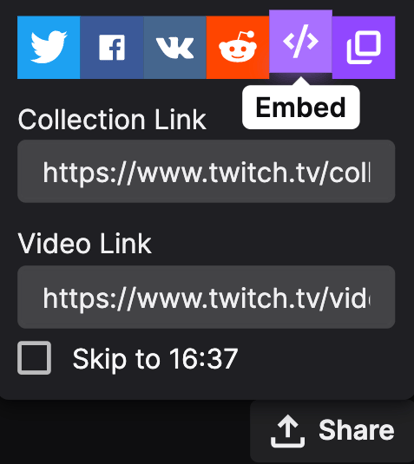
- You can get the Video ID by clicking the Share button located to the bottom right of the video. Click the purple "Embed" button:
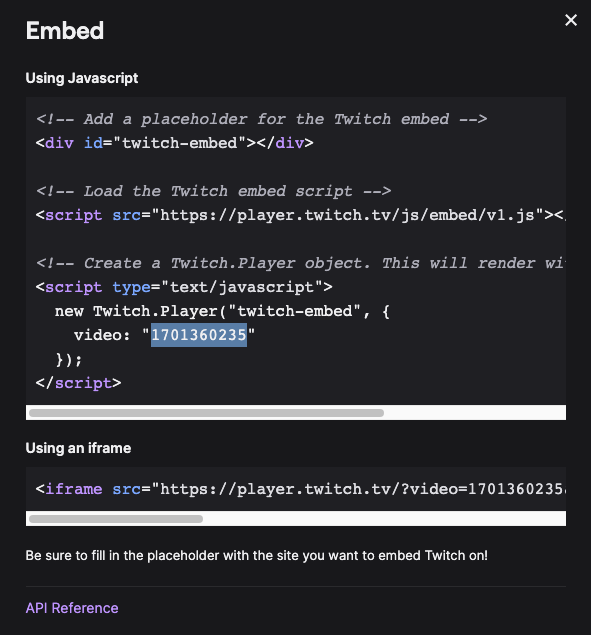
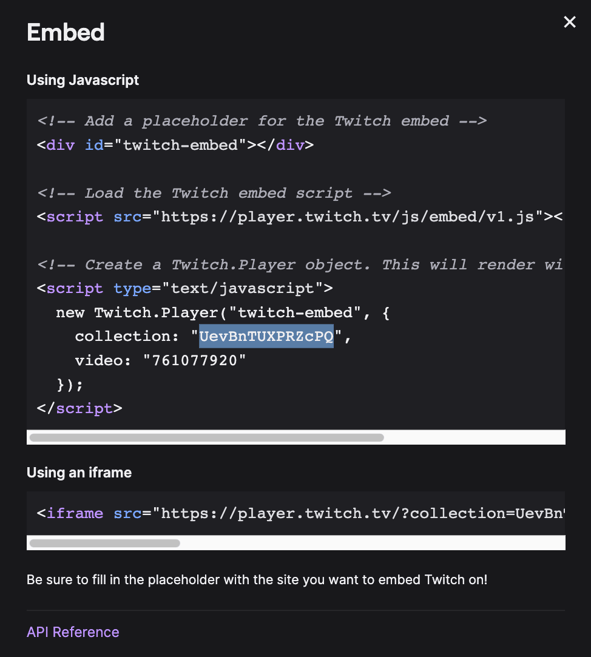
- The Embed Video box will appear.
- Highlight the set of numbers in the "video" line of code, within the "Using Javascript" section, and copy and paste this into a text doc to save for later:
- You can also copy the Video ID within the URL for the video. It is located at the very end of the URL for the page:

- Once you have acquired the Video ID, Navigate to the Builder within Adventive.
- Choose the ad format and dimensions of the ad unit you wish to add the Twitch player to. For guidance on building specific formats, check out this article.
- From the left menu, select the components icon
 , HTML5 Import.
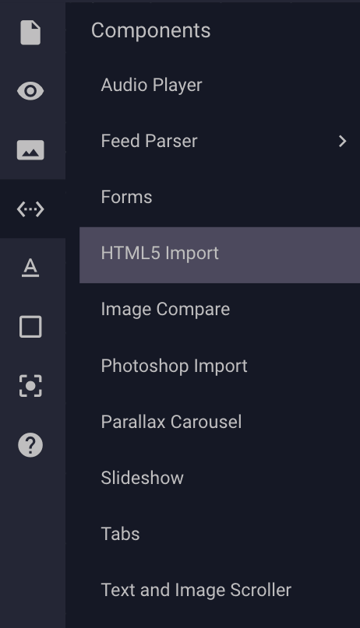
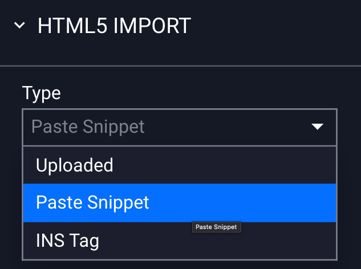
- Add the HTML Import Component to your ad unit in Adventive and select the "Paste Snippet" option in the HTML5 Import properties on the right side of the builder:
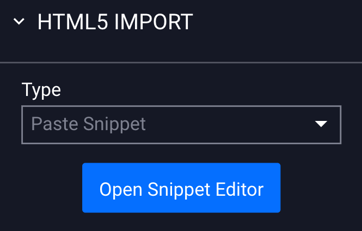
- Click the blue "Open Snippet Editor" button:
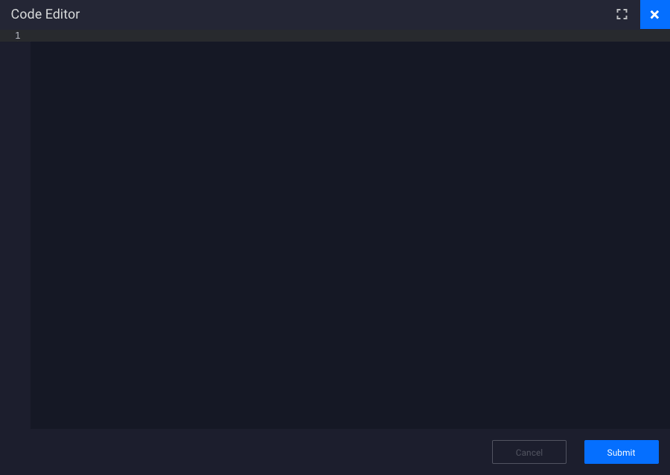
- The Code Editor box will appear:
- Copy the following code:
<!-- Add a placeholder for the Twitch embed -->
<div id="twitch-embed"></div>

<!-- Load the Twitch embed script -->
<script src="https://player.twitch.tv/js/embed/v1.js"></script>

<!-- Create a Twitch.Player object. This will render within the placeholder div -->
<script type="text/javascript">

var tPlayer = new Twitch.Player("twitch-embed", {
    width: "620",
    height: "378",
    video: "INSERT VIDEO ID HERE",
    parent: ['console.adventive.com','html5.adventivecdn.com', 'ads.adventive.com']
  });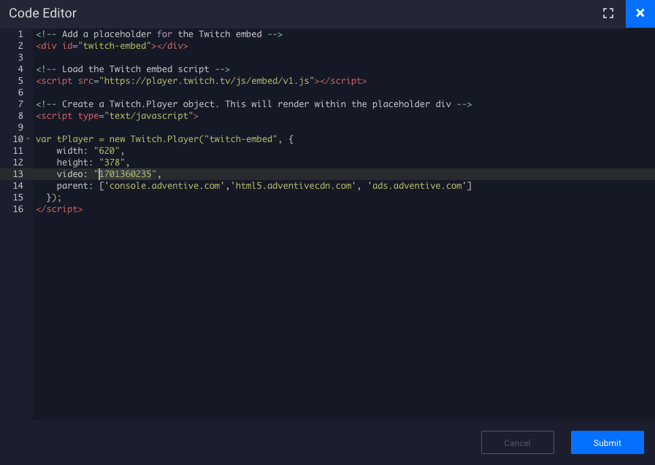
</script> - Then paste the above code into the Code Editor box:

- Copy the Video ID that we previously pasted into a separate text doc, and paste it into the code where it says "INSERT VIDEO ID HERE":
- Click Submit. The Twitch video should now display in the builder:
- Be sure to resize the player container if needed. Save, and use the Ad Previewer to test positioning and size for best results.
- To make adjustments to the code, click the Open Snippet Editor button again and make any changes needed.
Tracking Limitations
As Adventive is not hosting the content assets, we do not have the ability to track data from Twitch embeds, including views, quartiles or any engagements with controls. This will need to be pulled from Twitch as they are the host.
How to Insert a Twitch Collection Within Adventive
You can embed an individual video, a collection of videos, or a Twitch channel into an Adventive ad. Each code will differ slightly, depending on what you would like to insert.
- To insert a Collection, navigate to the collection on Twitch that you'd like to use in your Adventive ad.
- Copy the Collection ID from Twitch.
- You can get the Collection ID by clicking the Share button located to the bottom right of the video. Click the purple "Embed" button:
- The Embed Video box will appear.
- Highlight the set of numbers and letters in the "collection" line of code, within the "Using Javascript" section, and copy and paste this into a text doc to save for later:
- Once you have acquired the Collection ID, Navigate to the Builder within Adventive.
- Choose the ad format and dimensions of the ad unit you wish to add the Twitch player to. For guidance on building specific formats, check out this article.
- From the left menu, select the components icon , HTML5 Import.
- Add the HTML Import Component to your ad unit in Adventive and select the "Paste Snippet" option in the HTML5 Import properties on the right side of the builder:
- Click the blue "Open Snippet Editor" button:
- The Code Editor box will appear:
- Copy the following code:
<!-- Add a placeholder for the Twitch embed -->
<div id="twitch-embed"></div>

<!-- Load the Twitch embed script -->
<script src="https://player.twitch.tv/js/embed/v1.js"></script>

<!-- Create a Twitch.Player object. This will render within the placeholder div -->
<script type="text/javascript">

var tPlayer = new Twitch.Player("twitch-embed", {
    width: "620",
    height: "378",
    collection: "INSERT COLLECTION ID HERE",
    parent: ['console.adventive.com','html5.adventivecdn.com', 'ads.adventive.com']
  });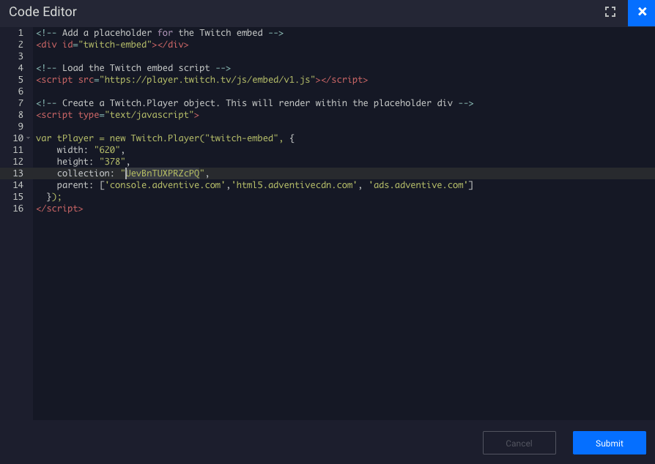
</script> - Then paste the above code into the Code Editor box:

- Copy the Collection ID that we previously pasted into a separate text doc, and paste it into the code where it says "INSERT COLLECTION ID HERE":
- Click Submit. The Twitch collection should now display in the builder:
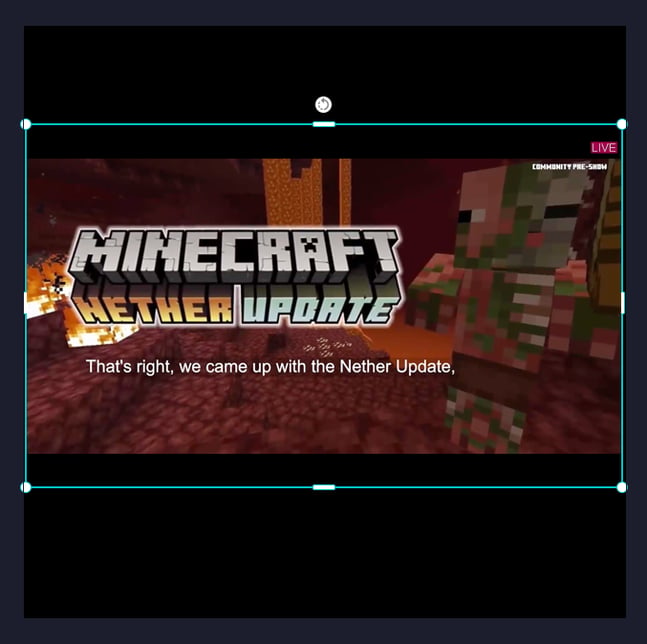
- Be sure to resize the player container if needed. Save, and use the Ad Previewer to test positioning and size for best results.
- To make adjustments to the code, click the Open Snippet Editor button again and make any changes needed.
Tracking Limitations
As Adventive is not hosting the content assets, we do not have the ability to track data from Twitch embeds, including views, quartiles or any engagements with controls. This will need to be pulled from Twitch as they are the host.
How to Insert a Twitch Channel Within Adventive
You can embed an individual video, a collection of videos, or a Twitch channel into an Adventive ad. Each code will differ slightly, depending on what you would like to insert.
- To insert a Channel, navigate to the channel on Twitch that you'd like to use in your Adventive ad.
- Copy the Name of the Channel from Twitch, and paste this into a text doc to save for later.
- You can see the name of the channel by navigating to their profile, or viewing any of their videos, and the channel name will appear to the bottom right, below the video. In the below example, the channel is "TheTangerineClub".
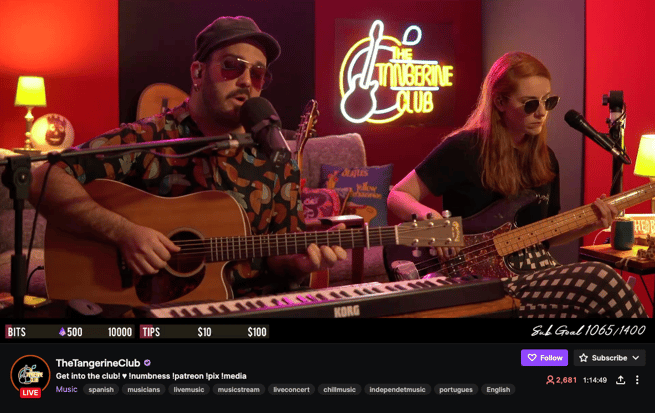
- You can also copy the channel name from the URL for the video. It is located at the very end of the URL for the page:

- Once you have acquired the channel name, Navigate to the Builder within Adventive.
- Choose the ad format and dimensions of the ad unit you wish to add the Twitch player to. For guidance on building specific formats, check out this article.
- From the left menu, select the components icon , HTML5 Import.
- Add the HTML Import Component to your ad unit in Adventive and select the "Paste Snippet" option in the HTML5 Import properties on the right side of the builder:
- Click the blue "Open Snippet Editor" button:
- The Code Editor box will appear:
- Copy the following code:
<!-- Add a placeholder for the Twitch embed -->
<div id="twitch-embed"></div>

<!-- Load the Twitch embed script -->
<script src="https://player.twitch.tv/js/embed/v1.js"></script>

<!-- Create a Twitch.Player object. This will render within the placeholder div -->
<script type="text/javascript">

var tPlayer = new Twitch.Player("twitch-embed", {
    width: "620",
    height: "378",
    channel: "INSERT CHANNEL NAME HERE",
    parent: ['console.adventive.com','html5.adventivecdn.com', 'ads.adventive.com']
  });
</script> - Then paste the above code into the Code Editor box:

- Copy the Channel Name that we previously pasted into a separate text doc, and paste it into the code where it says "INSERT CHANNEL NAME HERE":

- Click Submit. The Twitch video should now display in the builder:
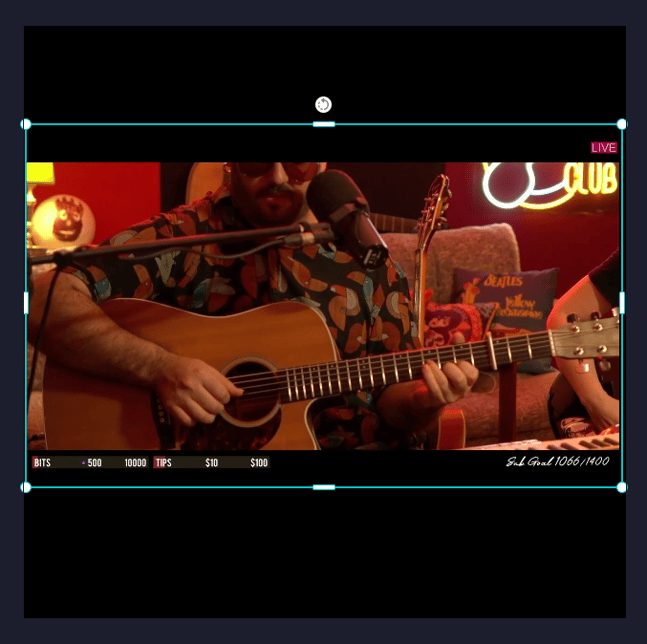
- Be sure to resize the player container if needed. Save, and use the Ad Previewer to test positioning and size for best results.
- To make adjustments to the code, click the Open Snippet Editor button again and make any changes needed.
Tracking Limitations
As Adventive is not hosting the content assets, we do not have the ability to track data from Twitch embeds, including views, quartiles or any engagements with controls. This will need to be pulled from Twitch as they are the host.
Chrome Heavy Ad Intervention
Chrome announced its plans to begin the implementation of steps to block ads that consume a large amount of device resources before the user interacts with an ad unit. The implementation of this functionality within Chrome is now being slowly rolled out and has the possibility of impacting your ads.
The purported reason for these new rules is to reduce the strain on device batteries and data plans, and to provide a quality online experience for users with mobile devices, however, these rules extend beyond mobile devices into the core Chrome desktop browser as well.
In the most simplistic terms, Chrome has determined that any ad unit which exceeds any of the following is at risk for removal:
- 4MB of network data usage
- 15 seconds of CPU usage within a 30 second period, or
- 60 seconds of CPU usage in total
The above thresholds are enforced for any ad type, including non-video ads, and VAST ads. Therefore, it is important to adhere to the requirements set forth, or risk the ad being removed by Chrome. Failure to do so produces the following experience in those ad slots for viewers of your site:

- We recommend keeping combined asset sizes per unit around 4MB, and to keep in-banner video length below 15 seconds, to help avoid unloading from Chrome Heavy Ad Intervention.
Limiting Autoplay for "Heavy Ads"
To help avoid any unloading from Chrome Heavy Ad Intervention when inserting Twitch video content into Adventive Ads, you can instead insert one of the following code snippets into the HTML5 import, which includes additional code that will limit the autoplay time of the video, collection, or channel. After a certain number of seconds, the video will pause, allowing the user to interact with the video before it continues playing. User interaction negates the risk of Heavy Ad Intervention.
Limited Autoplay Code for Inserting an Individual Video
- Follow the above steps in section 1 to copy the video ID from Twitch, and insert the HTML5 Import Component into your unit.
- Within the Code Snippet Editor, insert the following code instead:
-
<!-- Add a placeholder for the Twitch embed -->
<div id="twitch-embed"></div>

<!-- Load the Twitch embed script -->
<script src="https://player.twitch.tv/js/embed/v1.js"></script>

<!-- Create a Twitch.Player object. This will render within the placeholder div -->
<script type="text/javascript">
var pauseTime = 15;

var tPlayer = new Twitch.Player("twitch-embed", {
    width: "620",
    height: "378",
    video: "INSERT VIDEO ID HERE",
    parent: ['console.adventive.com','html5.adventivecdn.com', 'ads.adventive.com']
  });

  setTimeout(function(){
      tPlayer.pause();
  }, pauseTime * 1000);
</script> - Then paste the above code into the Code Editor box:
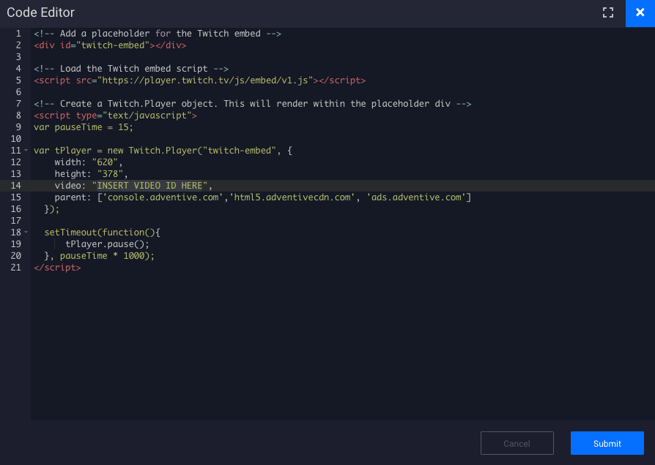
- You'll now see a new line in the code labeled "var pauseTime = 15" (row 9). This will limit the autoplay to 15 seconds. You can adjust the autoplay time by inserting a new number in this line of code.
* Note - We recommend an autoplay time of 15 seconds or less.
- Just like in section 1, copy the Video ID that we previously pasted into a separate text doc, and paste it into the code where it says "INSERT VIDEO ID HERE":

- Click Submit. The Twitch Video should now display in the builder:
- Be sure to resize the player container if needed. Save, and use the Ad Previewer to test positioning and size for best results.
- On preview, you'll now see the video pause after 15 seconds.
- To make adjustments to the code, click the Open Snippet Editor button again and make any changes needed.
Tracking Limitations
As Adventive is not hosting the content assets, we do not have the ability to track data from Twitch embeds, including views, quartiles or any engagements with controls. This will need to be pulled from Twitch as they are the host.
Limited Autoplay Code for Inserting a Collection of Videos
- Follow the above steps in section 2 to copy the Collection ID from Twitch, and insert the HTML5 Import Component into your unit.
- Within the Code Snippet Editor, copy and paste the following code instead:
-
<!-- Add a placeholder for the Twitch embed -->
<div id="twitch-embed"></div>

<!-- Load the Twitch embed script -->
<script src="https://player.twitch.tv/js/embed/v1.js"></script>

<!-- Create a Twitch.Player object. This will render within the placeholder div -->
<script type="text/javascript">
var pauseTime = 15;

var tPlayer = new Twitch.Player("twitch-embed", {
    width: "620",
    height: "378",
    collection: "INSERT COLLECTION ID HERE",
    parent: ['console.adventive.com','html5.adventivecdn.com', 'ads.adventive.com']
  });

  setTimeout(function(){
      tPlayer.pause();
  }, pauseTime * 1000);
</script>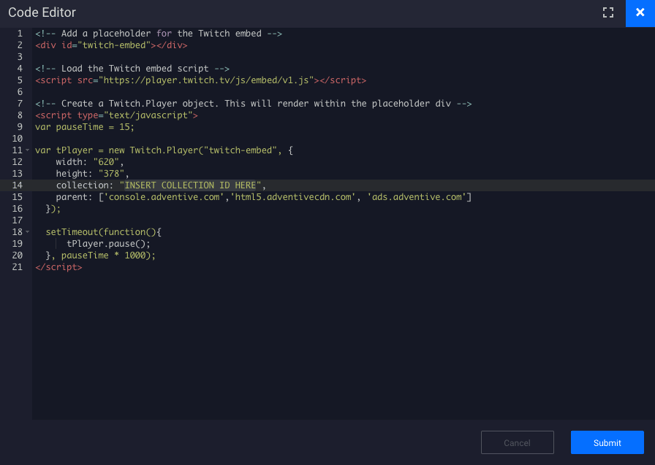
- You'll now see a new line in the code labeled "var pauseTime = 15" (row 9). This will limit the autoplay to 15 seconds. You can adjust the autoplay time by inserting a new number in this line of code.
* Note - We recommend an autoplay time of 15 seconds or less. - Just like in section 2, copy the Collection ID that we previously pasted into a separate text doc, and paste it into the code where it says "INSERT COLLECTION ID HERE":

- Click Submit. The Twitch video Collection should now display in the builder:
- Be sure to resize the player container if needed. Save, and use the Ad Previewer to test positioning and size for best results.
- On preview, you'll now see the video pause after 15 seconds.
- To make adjustments to the code, click the Open Snippet Editor button again and make any changes needed.
Tracking Limitations
As Adventive is not hosting the content assets, we do not have the ability to track data from Twitch embeds, including views, quartiles or any engagements with controls. This will need to be pulled from Twitch as they are the host.
Limited Autoplay Code for Inserting a Channel
- Follow the above steps in section 3 to copy the Channel Name from Twitch, and insert the HTML5 Import Component into your unit.
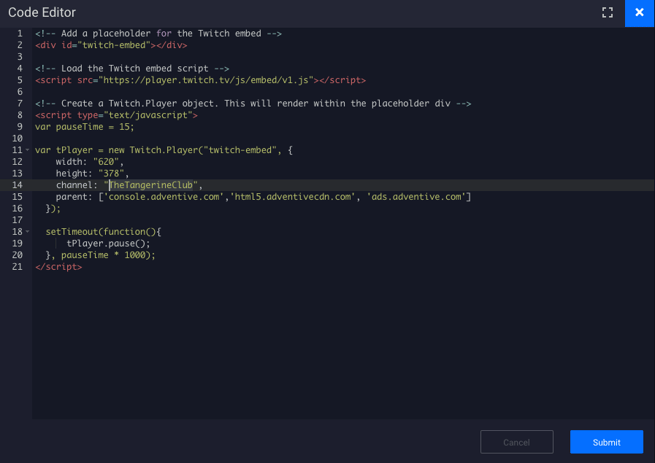
- Within the Code Snippet Editor, copy and paste the following code instead:
-
<!-- Add a placeholder for the Twitch embed -->
<div id="twitch-embed"></div>

<!-- Load the Twitch embed script -->
<script src="https://player.twitch.tv/js/embed/v1.js"></script>

<!-- Create a Twitch.Player object. This will render within the placeholder div -->
<script type="text/javascript">
var pauseTime = 15;

var tPlayer = new Twitch.Player("twitch-embed", {
    width: "620",
    height: "378",
    channel: "INSERT CHANNEL NAME HERE",
    parent: ['console.adventive.com','html5.adventivecdn.com', 'ads.adventive.com']
  });

  setTimeout(function(){
      tPlayer.pause();
  }, pauseTime * 1000);
</script>
- You'll now see a new line in the code labeled "var pauseTime = 15" (row 9). This will limit the autoplay to 15 seconds. You can adjust the autoplay time by inserting a new number in this line of code.
* Note - We recommend an autoplay time of 15 seconds or less. - Just like in section 3, copy the Channel Name and paste it into the code where it says "INSERT CHANNEL NAME HERE":
- Click Submit. The Twitch video Channel should now display in the builder:
- Be sure to resize the player container if needed. Save, and use the Ad Previewer to test positioning and size for best results.
- On preview, you'll now see the video pause after 15 seconds.
- To make adjustments to the code, click the Open Snippet Editor button again and make any changes needed.
Tracking Limitations
As Adventive is not hosting the content assets, we do not have the ability to track data from Twitch embeds, including views, quartiles or any engagements with controls. This will need to be pulled from Twitch as they are the host.