In this article, you will learn:
How to Add Actions to an Ad Unit
How to Add the Click to Email Action
How to Add Actions to an Ad Unit
Actions are single-event operations to trigger something specific to happen within your ad build. Any asset, text box, shape or Hitbox can have a corresponding Action set to it.
- Choose the ad format and dimensions of the ad unit you wish to add the Action to. For guidance on building specific formats, check out this article.
- Once you have created your ad, select the object you’d like to set an action to.
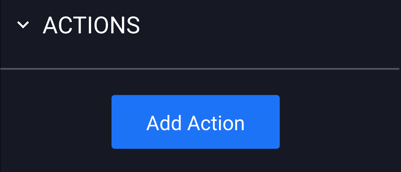
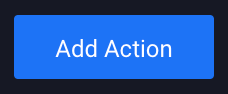
- Click the blue "Add Action" button on the right side of the builder:
- The "Actions" section will then appear in the Properties panel:
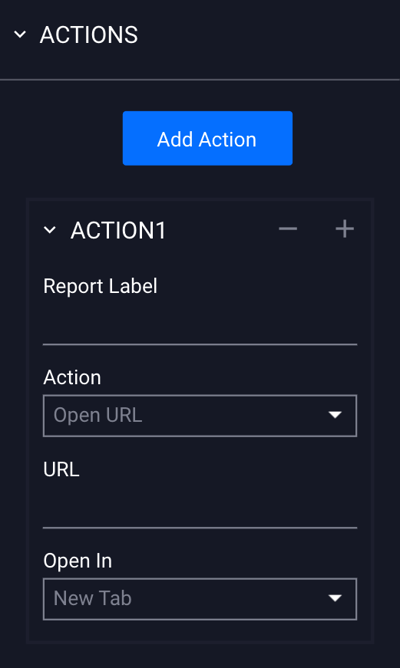
- You have the option to Open URL, Go To Screen, Open Adhesion, Open Overlay, Open as Full Page Flex, Open Sidekick, Call, Close Ad, Add To Calendar, Email, or Download File.
How to Add the Click to Email Action
The Click to Email Action opens an email prompt, easily allowing the user to connect via email.
- Select the asset or object on your canvas that you'd like to add the Click to Email Action to.
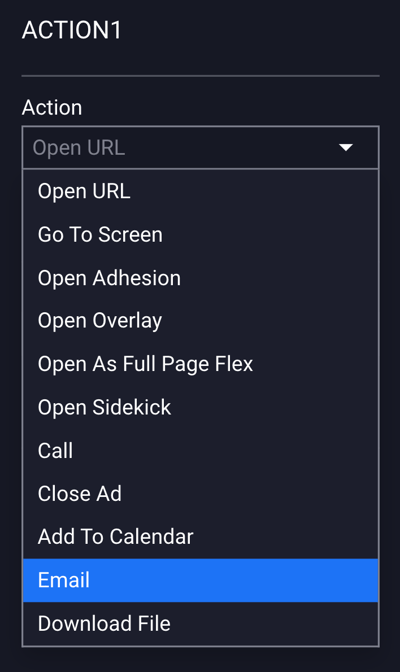
- Select Email from the Action dropdown menu:
- Once selected, the following fields will show:
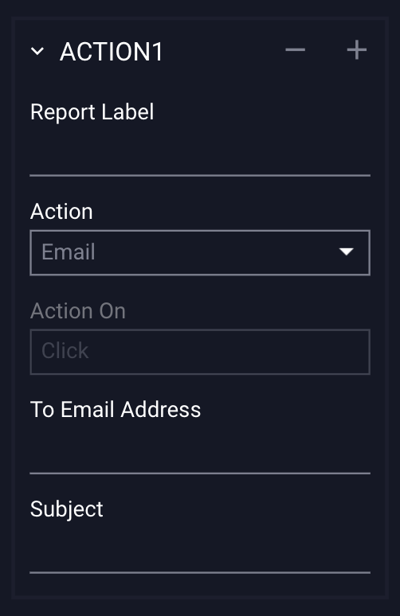
Configuration options for the Click to Email action are explained below:
| Report Label | (Optional) Append a unique label for the Click to Email action, which will display in campaigns and reporting. |
| Action | Single-event operations which trigger something specific to happen within you ad build. |
| Action On | Only Click can be selected for Email actions. |
| To Email Address | Enter the email address of the recipient. |
| Subject | Click into this field to enter a subject line for the email. |
Save and Preview to test.
- Once the email link is clicked, the unit will redirect the user to draft an email using their default mail program.
Additional Notes
- To add additional actions, select the blue “Add Action” button above your previously added Click to Email action:
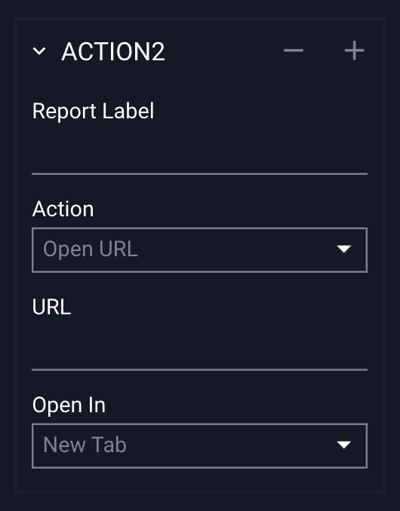
- Action 2 will then be added to the Actions Properties panel:
- To remove an action, select the object/layer/asset that has the action set and click the - (minus) button located at the top right of the added action, within actions panel.
- Clicking the + (plus) button will add a new action directly below the selected action.
