In this article, you will learn:
How to Add Third Party Tracking in the Campaign Manager
How to Add Impression Tracking
How to Add Engagement Tracking
How to Add Viewability Tracking
Additional Notes on Third Party Tracking
Notes on Third Party Tracking:
- Update your Third Party Trackers from within the Campaign Manager, not in the Builder. Once you have the ad in a placement in a campaign, you would replace your default URL placeholder and any other urls/placeholders with a tracker/or URL update.
- Everything you do in the campaign manager will override the builder. Trackers will not show in the builder, as this is only 1 creative unit in the builder. You can use the same unit multiple times within a campaign, with multiple sets of tracking.
- You can Preview each ad from the Campaign Manager by clicking on the magnifying glass icon
 to the right of each ad. Click the Console tab at the top right to view the trackers firing. Trackers will also show in the exported Excel Trafficking Worksheet, within the Tracking Tab.
 - To test that you have selected the Click Tag, copy/paste it into a browser and it should go to the live landing page.
-
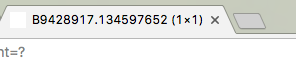
To test that you have selected the Impression url, copy/paste the actual Impression URL into any browser and it should go to a 1x1/you will see in browser tab:
- Check out the below video for a step-by-step walkthrough of adding Third Party Tracking to ad units:
How to Add Third Party Tracking in the Campaign Manager
- Open your document containing the Third Party Tracking. Often clients will supply tracking in the form of a .doc or .xlsx file.
* Note - If you are copying/pasting from an Excel worksheet, be sure you are actually clicking inside the Excel box and selecting/copying the Click URL and Impression trackers. - Go into the campaign you are looking to add a tracker to. Click the vertical 3 dots
 located to the far right of the Ad on hover (be sure you click at the Ad level):
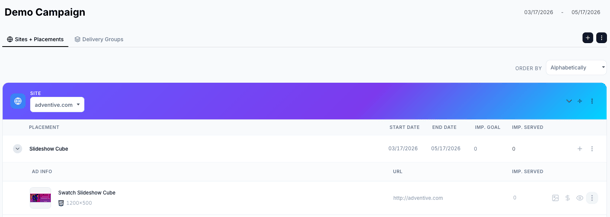
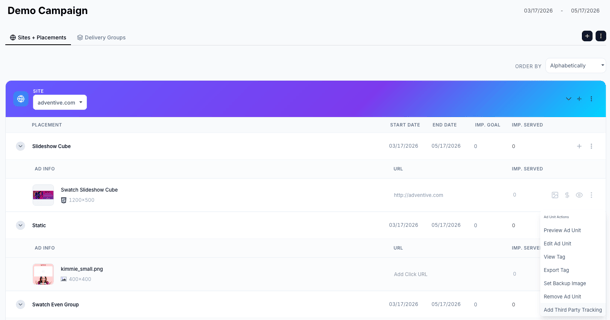
- Upon clicking the 3 dots, the below dropdown will appear. Select “Add Third Party Tracking” from the Ad Unit Actions dropdown menu:
- The following screen will appear:
How to add Click Tracking
* Note - Any clickthrough links you’ve added in the builder will automatically populate on the first tab – under Click URLs. All Click Trackers added within the campaign manager will override any links added within the builder.
Example of a DFP Click Tag:
https://ad.doubleclick.net/ddm/trackclk/N494401.1318ESSENCEONLINE/B24370107.297251415;dc_trk_aid=190556339;dc_trk_cid=145748289;dc_lat=;dc_rdid=;tag_for_child_directed_treatment=;tfua=;gdpr=${GDPR};gdpr_consent=${GDPR_CONSENT_755};ltd=
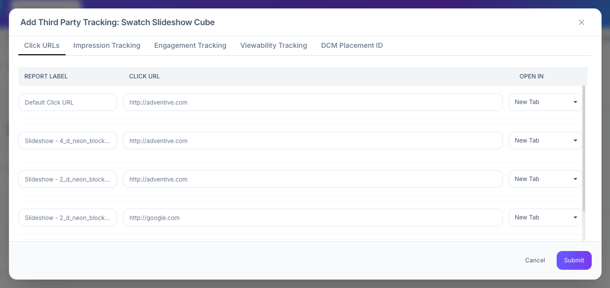
- Select the Click URLs tab and then click within the “Click URL” field to change the current URL to your tracker. Click the “Open In” drop down if you want to change/have the url open in either a New Tab or Same Tab.
Before: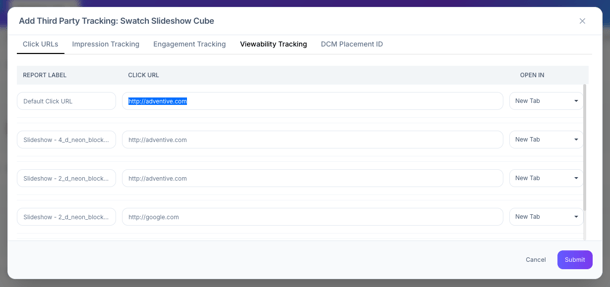
After: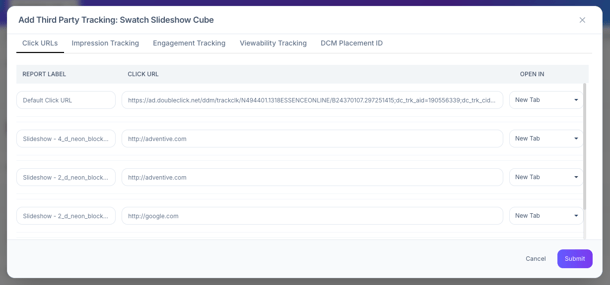
- Replace any urls that have populated with the appropriate Click Tracker. Any clickthrough URLs you insert within the builder on a Hitbox, image, slideshows, etc. will automatically populate here.
- Once done, Click Submit – or, you can now add other trackers (Impression, Engagement, Viewability).
* Note - If the clickthrough url is incomplete/contains extra characters, a red prompt stating "Invalid click URL" will appear. The platform will not allow user to move on to placing other trackers until it is corrected:
- Test URLs by clicking the Preview Icon
 next to the ad within the Campaign Manager.
 -
For a Slideshow Build, if you left each slide's URL as blank, it will default to the Default URL you specified in the General Properties in the builder and will show in the Campaign Manager's Third Party tracking. If you put in placeholder URLs, these will show. You can update (or not) the same way as above, by clicking within the Click URL field for each slide:
Helpful Hint: You can add as many Click Urls, Impression, Engagement and Viewability Tracking as needed per ad before hitting the Submit button in the bottom right corner.
How to add Impression Tracking
Example of DFP impression tracker:
<IMG SRC="https://ad.doubleclick.net/ddm/ad/N3577.1111111ADV.COM/B9428917.134597652;sz=1x1;ord=[timestamp];dc_lat=;dc_rdid=;tag_for_child_directed_treatment=?" BORDER=0 WIDTH=1 HEIGHT=1 ALT="Advertisement"></A>
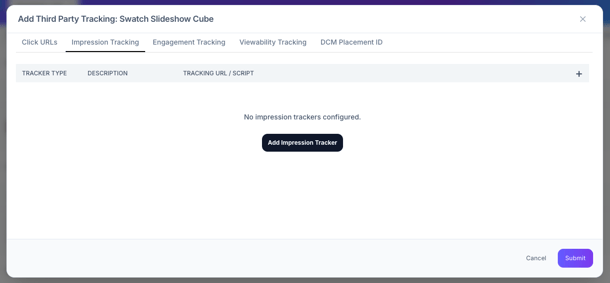
- Click the Impression Tracking tab. If there is no Impression tracker currently placed, a notification will come up for you to "Add Impression Tracker" (or click the “+” symbol top right):
- Leave "Tracker Type" as "Pixel", unless it is Script or a DCM INS tag (* instructions for INS below - and more info here). Copy/paste the Impression tracker into the “Tracking URL” input box (the description field is optional).
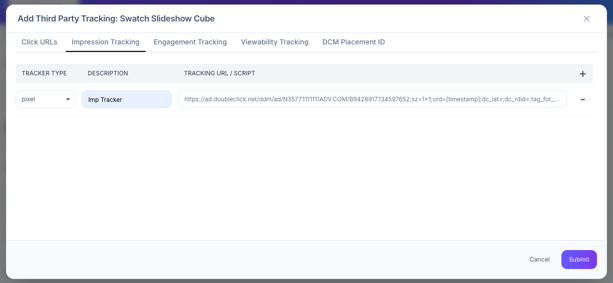
- Click Submit in the bottom right – or, you can now add more Impression Tracking, Engagement Tracking, or Viewability Tracking.
INS Impression Tracking
- Select "INS Tag" as the "Tracking Type":
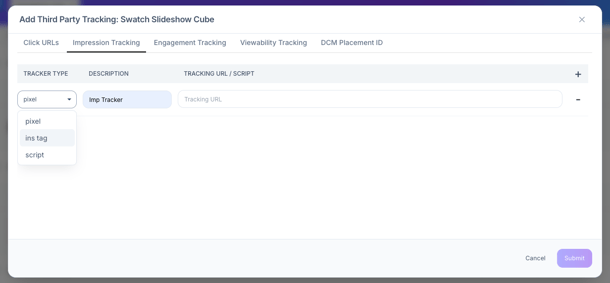
- Copy and paste the entire INS Impression tracker into the “Tracking URL” input box (the description field is optional):
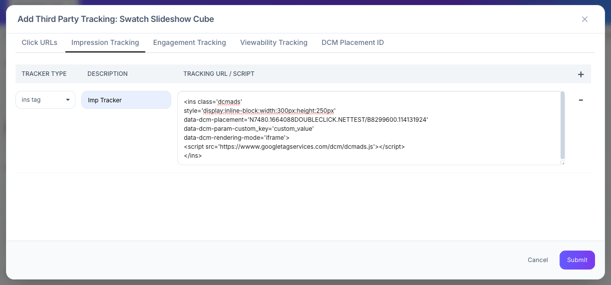
- Click Submit in the bottom right – or, you can now add more Impression Tracking, Engagement Tracking, or Viewability Tracking.
* Note - If the tracker is incomplete/contains extra characters, a red prompt stating "Invalid Impression tracking URL" will appear. The platform will not allow user to move on to placing other trackers until it is corrected:
How to add Engagement Tracking
(For Ads with Video or Slideshows)
We support engagement tracking for Videos/Slideshows, and for screen views in within multi-screen ads. Follow instructions from the third party, detailing which trackers should be implemented for each action (i.e. play button, mute, slide view, screen view, etc.)- Click the Engagement Tracking tab. If there is no Engagement tracker currently placed, a notification will come up for you to “Add Engagement Tracker" (or click the “+” symbol top right).

- Select the Engagement Type.
* Note - In this example, the video in our creative is from Youtube, so we'll select this as the Engagement Type. - Naming conventions that were updated for Screens, Hitboxes, etc. in the builder will populate here (also see our Screen & Layers article).

- Next, select the Action (View screen, AutoPlay, Play, Resume Video Play, Pause, Mute, Unmute and 1st, 2nd, 3rd, and 4th Quartiles - scroll down):

- Be sure to scroll using the scroll bar to see all the different actions (Quartiles towards bottom):

- Next, copy/paste the engagement tracker into the “Tracking URL” input box:

- To add more trackers – click the “+” symbol and follow the same steps (example below shows trackers placed for the Youtube video’s Play, Mute, 3rd and 4th Quartiles – if client provides individual trackers:

- Click Submit when finished, OR continue to Viewability Tracking.
* Note - If the tracker is incomplete/contains extra characters, a red prompt stating "Invalid engagement tracking URL" will appear. The platform will not allow user to move on to placing other trackers until it is corrected:
How to add Viewability Trackers
(Adventive currently supports DoubleVerify, MOAT, & IAS)
- Click the Viewability tab. If there is no Viewability tag currently placed, a notification will come up for you to “Add Viewability Tracker” (or click the “+” symbol top right):
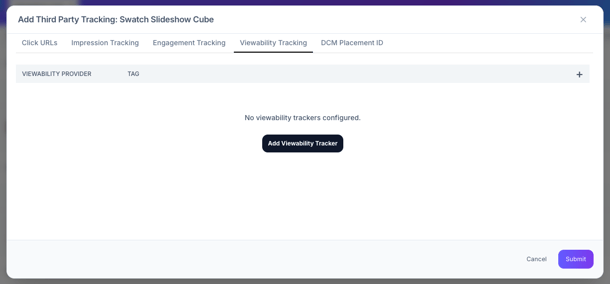
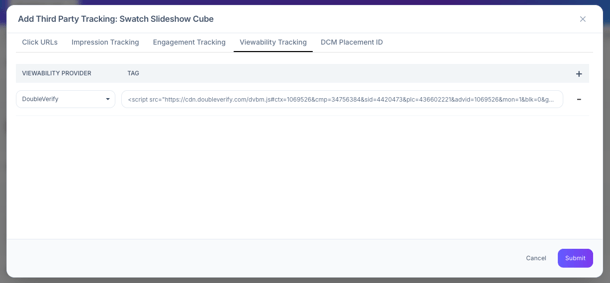
- Select the Viewability Provider from the dropdown (Adventive currently supports DoubleVerify, MOAT, & IAS).
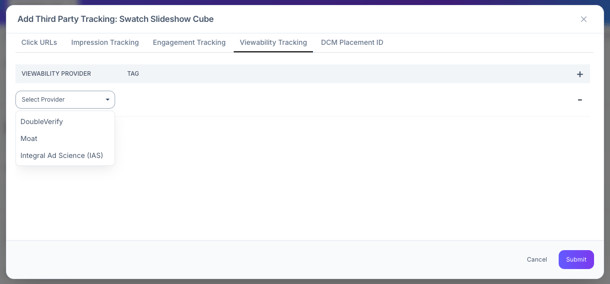
- Copy/paste the Viewability tracker into the “Tag" input box.
- Click Submit in the bottom right when finished – or, you can add additional Click Tracking, Impression Tracking, Engagement Tracking, or Viewability Tracking.
* Note - For specific examples of each type of tag/what to paste, please see our Viewability Tracking article.
![]()
* Note - If the Viewability Tracker is incomplete/contains extra characters, a red box will outline the Tag field. The platform will not allow user to move on to placing other trackers until it is corrected:
Additional Notes
- If this is an update to an existing campaign, be sure to Republish the campaign.
- Adventive embeds Third Party Trackers in the actual ad code (vs appending to the end of the tag), allowing you to update or add tracking at any time without generating new tags or re-trafficking.
- Click the orange republish icon at the top of the page to republish all ad units that have been updated.
- Alternatively, click the republish icon next to the individual ad line items to republish just that particular ad unit.
Updating Trackers/View Trackers:
- To make updates to Third Party trackers/or to view, you can re-select “Add Third Party Tracking" next to each ad and click within the field for the tracker you want to change or view:
Testing Third Party Tracking:
You can test trackers by previewing your ad(s) within the Campaign Manager.
- Within the campaign, click the eyeball icon
 to the right of the ad unit you'd like to test:
- Once selected, the ad unit will open for you to preview:
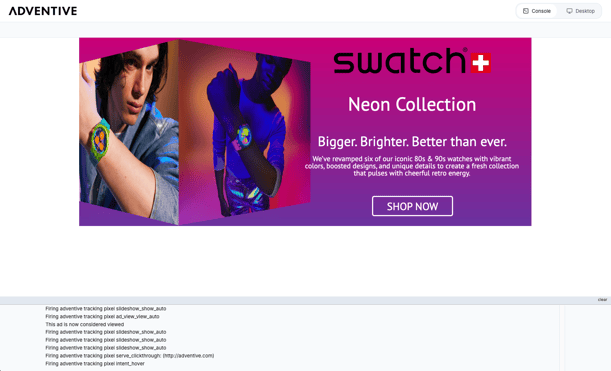
- In the upper right corner, click the "Console" button:
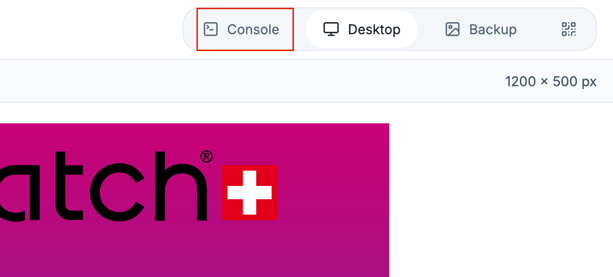
- Once selected, you'll be brought to our testing environment. At the bottom of the screen, you will see all Impression, Engagement, and Viewability trackers firing on the unit. To test the clickthrough, click on your unit and the click tracker will also fire in the bottom of the screen:
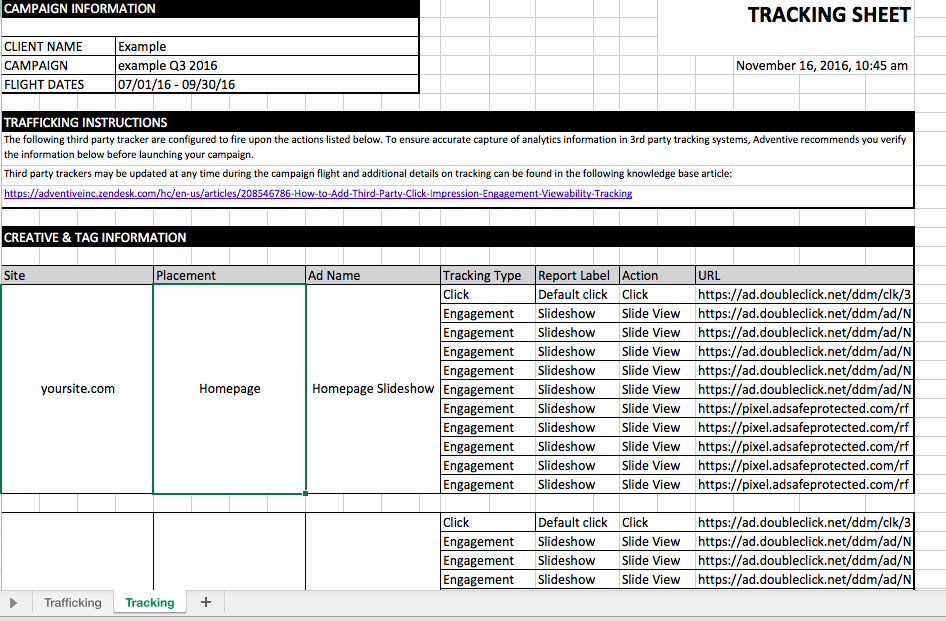
For Bulk Viewing of Trackers:
- When you Export Ad Tags as an Excel file, there will be a tab at the bottom of the downloaded Trafficking Sheet file called "Tracking" which will show each ad's corresponding trackers: