- This article will walk you through the process of building out a Sliding Interscroller Responsive Width Delivery Group, which can include 2-4 different units.
- With Delivery groups, you can setup and configure multiple creatives across multiple devices with a single ad tag. We offer six different types of Delivery Group algorithms.
In this article, you will learn:
How to Build Units for a Sliding Interscroller
How to Duplicate your Interscroller
How to Configure a Responsive Width Delivery Group
More information on each of these groups can be found within our corresponding articles below:
How to to Build Units for a Sliding Interscroller
Below you will find a step-by-step process to build a Sliding Interscroller:
For this Sliding Interscroller example, we'll be building out the Burning Man Sliding Interscroller unit:Burning Man Sliding Interscroller
- First, prepare your assets. We'll be creating 4 separate Interscroller units, which will then be added to a Responsive Width Delivery Group. We recommend building out 2-4 units for this type of delivery group. All units should be the exact same size, with slight variations in the designs.
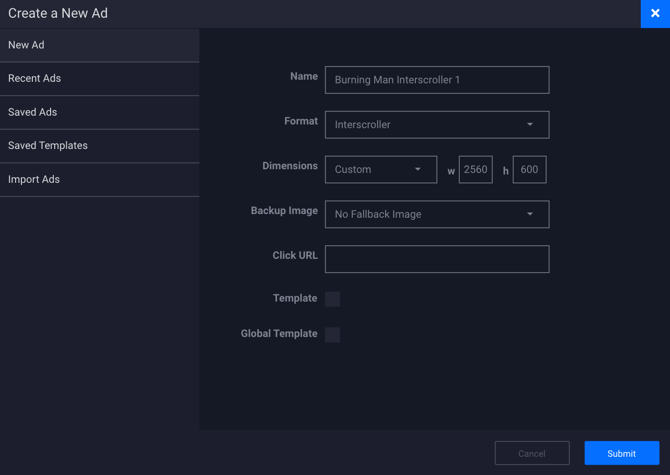
- Provide a unique Name for the first unit, and select Interscroller from the Format dropdown.
* In this example, we've named the first Interscroller "Burning Man Interscroller 1" - Select the pre-populated Desktop or Mobile option from the Dimensions dropdown menu, or select Custom to create your own.
* In this example, we selected Custom, and sized it to 2560x600. - Backup Image (Optional) and Click URL (Optional) may be left blank at this time, click Submit.
- The builder will now load the main Interscroller canvas based on the recommended sizes listed above, or the custom sizes you have inputted in step #2:
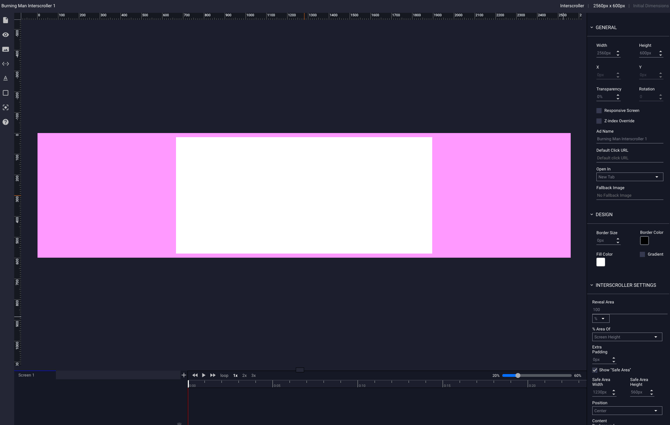
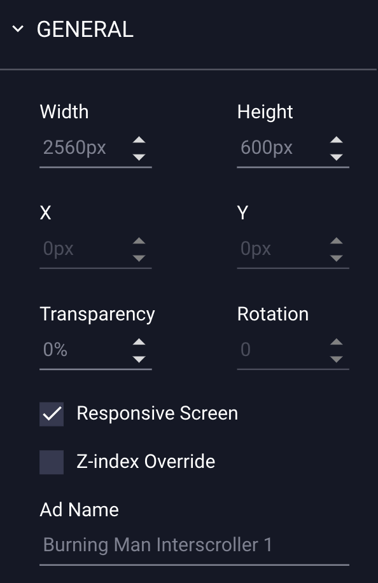
* Note - The "white" section in the above example is considered the "Safe Area", where the most important content should reside. Place your background image on the stage (overflow is fine), then ensure that the text/content are within the "Safe Area." This is most important in terms of the unit's height. As long as the Responsive Width setting is selected (see below) this will ensure that the unit fits horizontally within the user's screen. - Select Responsive Screen in the righthand side General Properties panel. This will allow your ad unit to scale responsively, based on the size of the screen the unit is viewed on:
- Configure the Interscroller Properties:
- More information on configuring the Interscroller properties can be found within our knowledge base article here: Interscroller
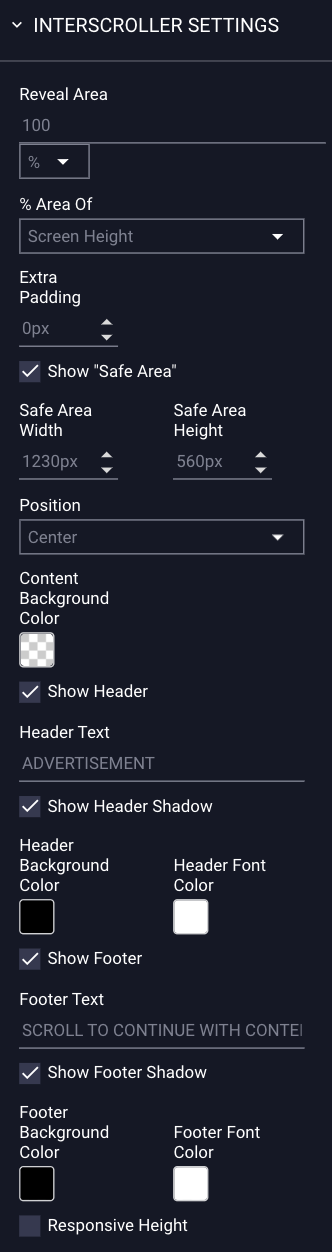
- For this Sliding Interscroller, we'll need to set the Reveal Area to
100% Area of Screen Height:
- Next we'll need to uncheck "Show Header" and "Show Footer". For the Interscrollers to slide and rotate through seamlessly, we'll need to remove these from the units. The settings for your Sliding Interscroller should be set up as follows:
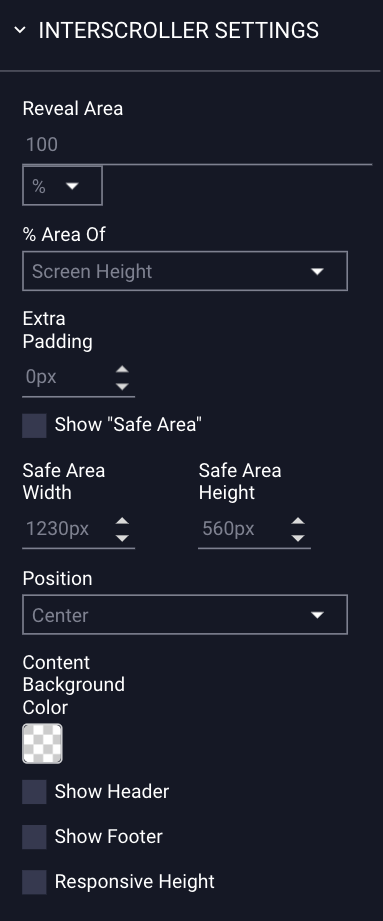
- The Position can be set as Center, Top, or Bottom, but the "Scrolling" position will not work for this type of delivery group.
- Add all assets to your canvas. For this example, we are only using one layer per ad unit, but you can use as many layers as you'd like.

* Note - To ensure that you have seamless transitions between the units, it's important that all layers you want to stay the same are located at the exact same x and y coordinates on each unit. -
Save the ad.
- Click on the Preview icon
 to view the ad.
How to Duplicate Your Interscroller
- Once you have finished designing your first Interscroller, click File > Save As to create your second copy, which will contain the second version of imagery for the Sliding Interscroller Responsive Width Delivery Group.
- In this example, we'll call our second Interscroller "Burning Man Interscroller 2":
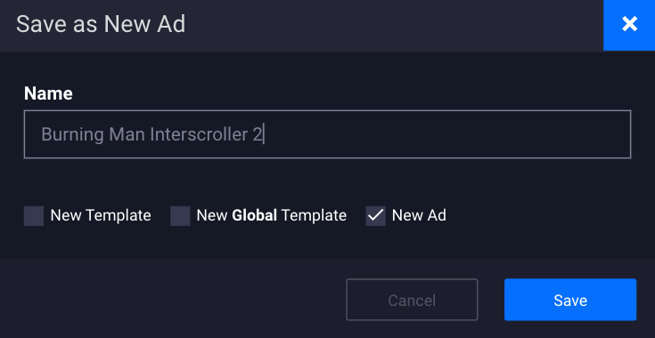
- Make sure "New Ad" is checked within the menu, and click Save.
- Your original unit will be duplicated with all of the same settings attributed to the first Interscroller.
- Next, we'll need to replace the assets with the imagery for the second Interscroller.
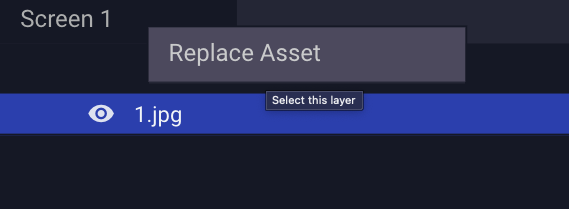
- Assets can be easily replaced by navigating to the Screens and Layers panel, clicking on the layer you want to replace, and selecting "Replace Asset":
- This will reopen the asset menu, where you can then select your next image for the second Sliding Interscroller:
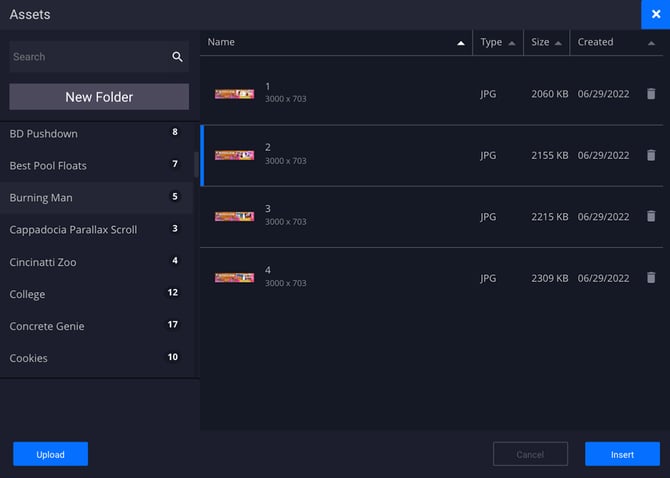
- Select your asset and click Insert.
* Note - In this example, we've selected the JPG asset "2". - Your new asset will then replace the previous one on your canvas. Resize and reposition as needed, then Save and Preview
 .
. - Duplicate your ad again and repeat the above steps as needed for each unit you are creating for the Sliding Interscroller Delivery Group.
* Note - In this example, we'll create 2 additional units using the assets "3" and "4", shown within the assets menu image above.
Configure a Responsive Width Delivery Group
- Once all of your units have been saved within the builder (in this example, 4 units have been created and saved), you'll navigate out of the builder and into the campaign manager by navigating to the far left side menu (past the tool bar) and selecting Campaigns:

- Once selected, you will be brought to the campaign manager, where you'll either add your Interscrollers/Delivery Group to an existing campaign, or create a new campaign.

- To create a new campaign, navigate to the far right and click New Campaign:

- This will open a menu where you can name your campaign and select the flight dates for it:

- Once you have entered a name for your campaign and selected the flight dates, click Submit.
- Your campaign will be created. Add any Sites and Placements to organize your campaign. In this instance, we've added one site (adventive.com) and one placement (Sliding Interscroller):

- More information on setting up a campaign can be found within these articles:
Campaign Manager Overview
Creating, Editing, and Managing Campaigns - Next, we'll configure the Responsive Width Delivery Group. At the top of the campaign, click Delivery Groups, located to the right of the Sites + Placements tab:

- Select Create Deliver Group:

- A menu will appear for you to name your Delivery Group, and select the algorithm. We'll select Responsive Width from the dropdown menu:

- Hit Submit.
- Your Delivery Group will be created, and the campaign manager will prompt you to add ad units to the group. Select Add Ad Units:
- A menu will appear for you to select all of the units that were created:

- Select the units you want to include in the group, and click Submit.
- All of your units will then be added to the Delivery Group:

- Next, we'll change the Min Width for each unit. We'll enter the Min Width for each unit in corresponding order: 1, 2, 3, 4. Max widths can be left blank.
* Note - You would only need to enter as many numbers as the amount of ad units included in the group. For example, if you only have 2 units, the numbers will be 1 and 2 only.
- Once your Delivery Group is set up, click the Sites + Placements tab at the top of the campaign.
- Locate the placement you'd like to add the Delivery Group to, and click on the three vertical dots to the far right of the placement name
 . This is the Placement Actions menu.
 - Select Add Delivery Group from the Placement Actions menu:

- Select your Delivery Group from the menu, and hit Submit.

- Your Delivery Group will be added to your campaign:

- You can then add any Third Party Tracking or Clickthrough Links to your units by clicking on the three vertical dots located to the right of each unit within the group, and then selecting Add Third Party Tracking from the Delivery Group Ad Unit Actions menu:

- More information on Third Party Tracking can be found within the following articles:
Understanding Third Party Tracking
Click Tracking
Impression Tracking
Engagement Tracking
Viewability Tracking - Be sure to republish all units once any changes have been made. Check out our article Updating Inflight Campaigns for more information on republishing ad units within a campaign.
- Preview your Delivery Group by clicking on the magnifying glass icon
 , located to the right of the Delivery Group.
 - Export your campaign tags.